Çok fazla Input olan bir proje içerisinde Validation çok zahmetli bir hal alabiliyor. Bu durumlarda işinizi kolaylaştıracak ve proje geliştirme sürenizi kısaltacak bir validation yöntemini sizlere sunuyorum.
KURULUM
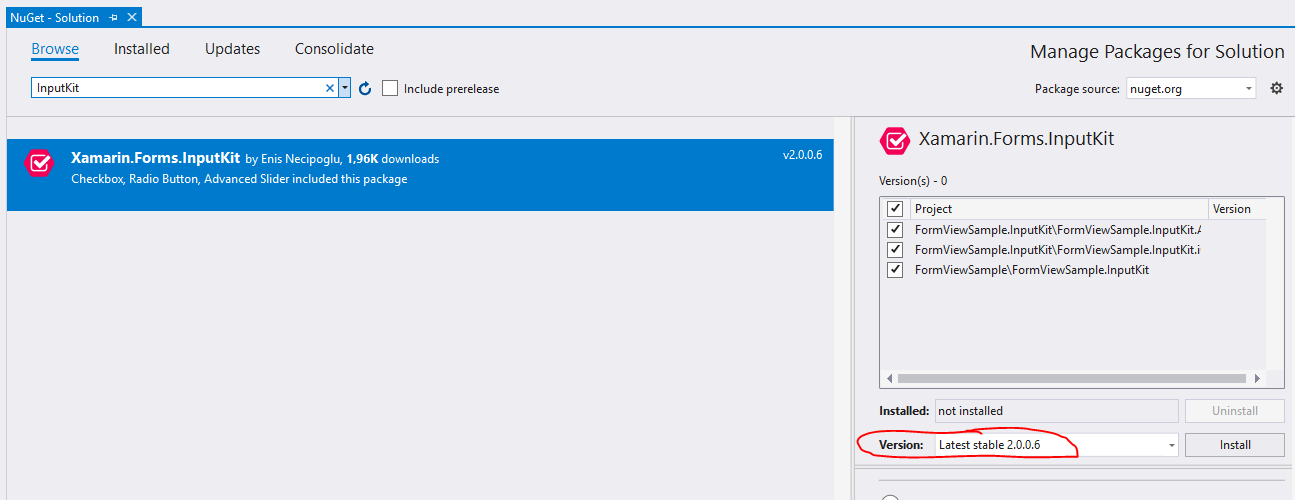
Öncelikle projemize Xamarin.Form.InputKit nuget paketini indiriyoruz.

Eğer AdvancedEntry’nin uyarı olarak ikon göstermesini istiyorsak, alert.png adında 24dp’lik bir ikonu projemize eklememiz gerekiyor. AdvancedEntry onu gösteriyor olacak.
KULLANIM
Tasarımı Oluşturma
Şu şekilde bir kayıt formunun olduğu bir senaryo oluşturalım:

Bunu yapmadan önce InputKit içerisindeki nesneleri kullanacağımız için ContentPage tag’i içerisine xmlns attribute’ü eklememiz gerekiyor.
xmlns:input=”clr-namespace:Plugin.InputKit.Shared.Controls;assembly=Plugin.InputKit” satırını ekleyelim.
ekledikten sonra XAML dosyamız şu şekilde olacak:
<ContentPage xmlns="http://xamarin.com/schemas/2014/forms"
xmlns:x="http://schemas.microsoft.com/winfx/2009/xaml"
xmlns:local="clr-namespace:FormViewSample.InputKit"
xmlns:input="clr-namespace:Plugin.InputKit.Shared.Controls;assembly=Plugin.InputKit"
x:Class="FormViewSample.InputKit.MainPage"
BackgroundColor="WhiteSmoke">
<ContentPage.BindingContext>
<local:MainViewModel/>
</ContentPage.BindingContext>
<ContentPage.Content>
<StackLayout Padding="30">
<Label Text="You can see FormView Below:"/>
<BoxView HeightRequest="1" Color="LightGray" />
<input:FormView IsValidated="{Binding IsValidated}">
<input:AdvancedEntry
Text="{Binding Email}"
IsRequired="True"
Title="Place your email below:"
Annotation="Email"
Placeholder="sample@domain.com"
AnnotationColor="Accent"
ValidationMessage="Please type a valid email address"
IconImage="ic_email_black_24dp.png"
MinLength="10"
MaxLength="50"
/>
<input:AdvancedEntry
Text="{Binding NameSurname}"
IsRequired="True"
Title="Place your name below:"
Annotation="NameSurname"
Placeholder="John Doe"
AnnotationColor="Accent"
ValidationMessage="Please type your name correctly"
IconImage="ic_account_circle_black_24dp.png"
MinLength="5"
MaxLength="30"
/>
<input:AdvancedEntry
Text="{Binding Phone}"
IsRequired="True"
Title="Place your phone number below:"
Annotation="Phone"
Placeholder="5439998877"
AnnotationColor="Accent"
ValidationMessage="Please type your phone number correctly"
IconImage="ic_account_circle_black_24dp.png"
MaxLength="10"
/>
<Label Text="Choose your subscription type:" />
<input:RadioButtonGroupView IsRequired="True">
<input:RadioButton Text="Free" />
<input:RadioButton Text="Bronze" />
<input:RadioButton Text="Gold" />
<input:RadioButton Text="Platinium" />
</input:RadioButtonGroupView>
<input:CheckBox IsRequired="True" Type="Check" Text="I Accept User Agreement" />
<Button Command="{Binding SubmitCommand}" Margin="0,20" Text="Submit" BackgroundColor="Accent" CornerRadius="20" TextColor="White" />
</input:FormView>
</StackLayout>
</ContentPage.Content>
</ContentPage>
Burası hazır. Artık ViewModel’imizi oluşturup her şeyi kontrol edebiliriz.
ViewModel oluşturma
Tasarım kısmında yazmış olduğumuz Binding tag’leri için property’lerimizi oluşturalım. ViewModel’i aşağıdaki gibi oluşturalım:
using System.Collections.Generic;
using System.ComponentModel;
using System.Runtime.CompilerServices;
using System.Text;
using Xamarin.Forms;
namespace FormViewSample.InputKit
{
public class MainViewModel : INotifyPropertyChanged
{
private string _nameSurname;
private string _email;
private string _phone;
public MainViewModel()
{
SubmitCommand = new Command(Submit);
}
public Command SubmitCommand { get; set; }
public bool IsValidated { get; set; }
public string NameSurname { get => _nameSurname; set { _nameSurname = value; OnPropertyChanged(); } }
public string Email { get => _email; set { _email = value; OnPropertyChanged(); } }
public string Phone { get => _phone; set { _phone = value; OnPropertyChanged(); } }
async void Submit()
{
if (!IsValidated)
{
await Application.Current.MainPage.DisplayAlert("", "You must fill all areas correctly!", "OK");
}
//DO SOME STUFFS HERE
}
#region INotifyPropertyChanged Implementation
public event PropertyChangedEventHandler PropertyChanged;
public void OnPropertyChanged([CallerMemberName]string propName = "") => PropertyChanged?.Invoke(this, new PropertyChangedEventArgs(propName));
#endregion
}
}
Şimdi gidip XAML kısmından ViewModel’i kullandığımızı belirltelim:
<ContentPage xmlns="http://xamarin.com/schemas/2014/forms"
xmlns:x="http://schemas.microsoft.com/winfx/2009/xaml"
xmlns:local="clr-namespace:FormViewSample.InputKit"
xmlns:input="clr-namespace:Plugin.InputKit.Shared.Controls;assembly=Plugin.InputKit"
x:Class="FormViewSample.InputKit.MainPage"
BackgroundColor="WhiteSmoke">
<ContentPage.BindingContext>
<local:MainViewModel/>
</ContentPage.BindingContext>
...
...
...
Örnek Projeye buradan ulaşabilirsiniz.


